Creating textured art at home allows individuals to explore their creativity while adding depth and dimension to their artistic expressions. This process can transform simple materials into stunning visual pieces, making art more accessible and enjoyable. Experimenting with various textures not only enhances the aesthetics of artwork but also provides a therapeutic outlet for self-expression.
Many techniques exist to achieve texture, from using everyday items like sponges and brushes to incorporating unique materials such as fabric or paper. Artists can layer different mediums, including paint, clay, or mixed media, to build captivating effects. This DIY approach encourages experimentation, enabling artists to discover their personal style.
Textured art not only beautifies a space but also invites viewers to engage more deeply with the piece. As they create, individuals can connect with their emotions and thoughts, resulting in artwork that resonates on a personal level. Textured art simplifies the artistic process, encouraging everyone to participate in the joys of creation.
Understanding Textures in Art
Textures play a crucial role in art, enhancing visual interest and emotional impact. Artists utilize various textures to create depth and engage viewers, making texture an integral element of composition.
Types of Textures
Textures can be categorized into two main types: actual textures and implied textures.
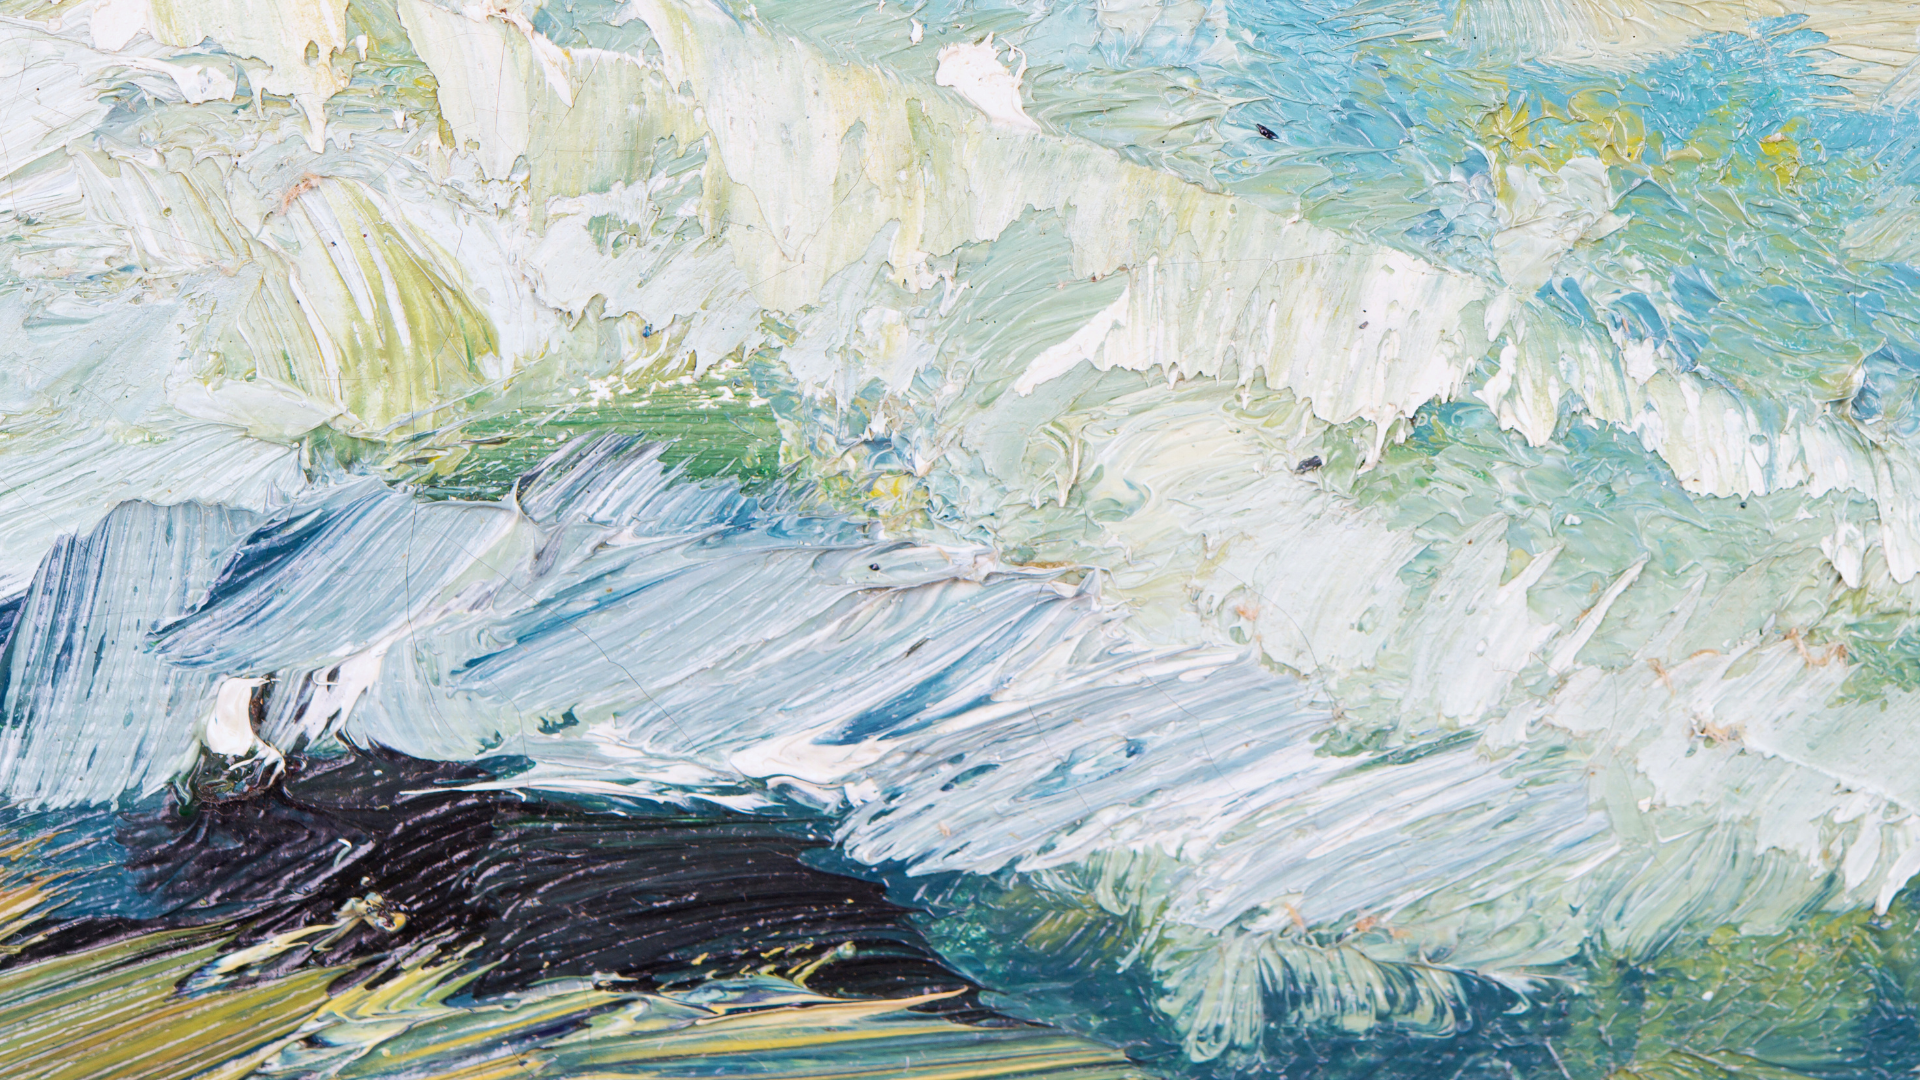
- Actual Textures: These textures can be physically felt. Examples include the roughness of sandpaper or the soft touch of fabric. Artists can achieve this by layering materials such as acrylics, plaster, or mixed media.
- Implied Textures: These textures are visual, created through techniques like brushwork or shading. They suggest a texture without a physical surface. A painted depiction of fur or the illusion of a wooden surface falls into this category.
Both types contribute to the overall experience of the artwork.
The Role of Texture in Composition
Texture significantly impacts the composition of art pieces. It can guide the viewer’s eye and create focal points.
- Contrast: Varying textures can create a dynamic interplay between smooth and rough areas. This contrast engages the viewer and adds complexity.
- Depth: Textures add a sense of depth. Layers can be used to build dimensions, encouraging exploration of the artwork.
- Emotion: Different textures evoke various feelings. A smooth surface may convey calmness, while a rough one might suggest chaos or energy.
Incorporating texture thoughtfully enhances the storytelling aspect of the artwork.
Materials and Tools
Creating textured art requires careful selection of materials and tools to achieve desired effects. The right combination of mediums and essential equipment enhances the creative process and final presentation.
Choosing the Right Medium
When selecting a medium for textured art, common options include acrylic paint, oil paint, and mixed media. Acrylics are versatile and dry quickly, suitable for layering textures. Oils provide rich, deep colors but take longer to dry.
Textured paste is another excellent option, allowing artists to build surfaces easily. Products like modeling paste or gel medium can create dimensional pieces when applied with palette knives or brushes.
Natural materials like sand, fabric, and paper can also serve as mediums. Incorporating these substances adds distinctive textures and visual interest.
Essential Tools for Texturing
A few essential tools can greatly enhance the texturing process.
- Palette knives are crucial for applying and manipulating pastes or thick paints. They come in various shapes, allowing for flexibility in achieving different textures.
- Brushes of various sizes and stiffness are needed for applying paint and creating specific patterns.
- Sponges and rags can be used to dab or wipe away paint, creating interesting surface effects.
Rollers and stencils can also introduce unique patterns and textures. An embossing tool will allow for finer detailing.
Choosing the right tools tailored to the desired effects will make textured art creation more dynamic and engaging.
Creating Textured Art
Creating textured art involves preparing the work surface, employing various texturing techniques, and layering materials for added visual interest. Each of these elements contributes to the overall effectiveness and appeal of the artwork.
Preparation of the Work Surface
Preparing the work surface is crucial for successful textured art. Artists should choose a sturdy base like canvas, wood, or heavy paper. The surface must be cleaned and primed, often using gesso, to enhance adhesion and durability.
Application of an initial base color can establish a foundation for the texture. Artists may use brushes or sponges for this task. Ensuring the surface is dry before texturing is important, as it prevents unwanted blending and allows for controlled layering.
Texturing Techniques
Several techniques are available for creating texture in art. Impasto is one of the most common methods, involving thick application of paint or medium with palette knives or brushes. This technique adds depth and dimension.
Collage is another effective technique, as it incorporates various materials such as fabric, paper, or found objects. Adhesives like Mod Podge can secure these items and introduce additional textures. Artists may also use tools like stamps, combs, or even household items to create unique impressions and patterns in the medium.
Adding Visual Interest Through Layering
Layering is an effective way to enhance aesthetics in textured art. This can be achieved by applying different materials or paints in multiple coats. Each layer adds depth and complexity, revealing elements underneath.
Combining colors and textures can create striking contrasts. For instance, thick layers of paint can be interspersed with thin glazes to achieve a varied visual experience. Artists might also consider incorporating transparency through the use of acrylics or gels, which let underlying textures show through while adding to the overall visual narrative.
Finishing and Protecting Your Artwork
After creating textured art, proper finishing and protection enhance its longevity and visual impact. Effective sealing and suitable display methods are crucial for preserving the artwork’s integrity.
Sealing and Protecting Textured Art
Sealing textured art helps maintain its color and texture while providing a protective barrier against dust, moisture, and UV light. Artists can choose from various sealants, including acrylic, varnish, or resin.
- Acrylic Sealants: Quick-drying and water-resistant, they are ideal for many surfaces.
- Varnishes: Available in matte or glossy finishes, they enhance color vibrancy.
- Resin Coating: Creates a thick, glossy finish but requires more careful application.
Before sealing, ensure the artwork is fully dry. Applying multiple thin layers can offer better protection than a single thick coat.
Displaying Textured Artworks
Displaying textured art correctly is vital for preserving its aesthetic and structural integrity. Consider the following methods:
- Framing: Choose a deep frame to accommodate the texture without crushing it.
- Hanging: Use wall mounts that prevent direct wall contact to allow airflow and reduce dampness.
- Lighting: Position the artwork away from direct sunlight to avoid fading; use adjustable lighting for optimal visibility without harsh glare.
These considerations ensure that the artwork remains vibrant and intact over time.